Sunday, May 07, 2006

The Patio Project


We've debated for some time what to do with the back yard. We toyed with the idea of a deck and had several contractors out to give us a bid for a patio. We finally decided on the patio made of pavers about 18" on a side. First we had 50 metres of pavers delivered. The man who did the delivery could sure make the equipment do what he wanted it to. He didn't have much room, but managed to put 5 pallets of pavers in a little space beside our driveway. This is an aerial view taken from our bedroom window.


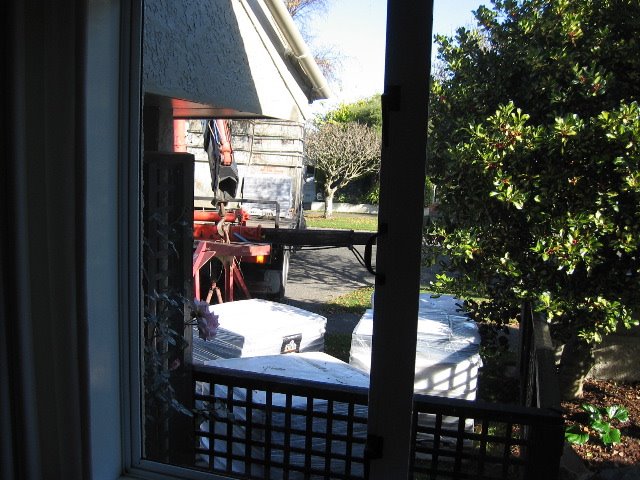
Here's another view, this time from my office. The driver got a little nervous if we got too close. I don't blame him.


This is a bit closer, but I'm still on the other side of the fence that goes around our yard. You can see he had a little trouble with the trees, but managed to get the pallets unloaded.


That thing looks awkward, but works on the principle of center of gravity. When the pressure is on, it stays put and lifts the load. When the pressure is off, the center of gravity shifts to the closed end and the whole mechanism slips out of the pallet.


Aru is a student of Karen's who used to do this kind of work before coming to SIT. He's quite a worker. He dug out the back yard and together we hauled the dirt to the tip. Dirt is heavy, so they charged us quite a bit to dump it.


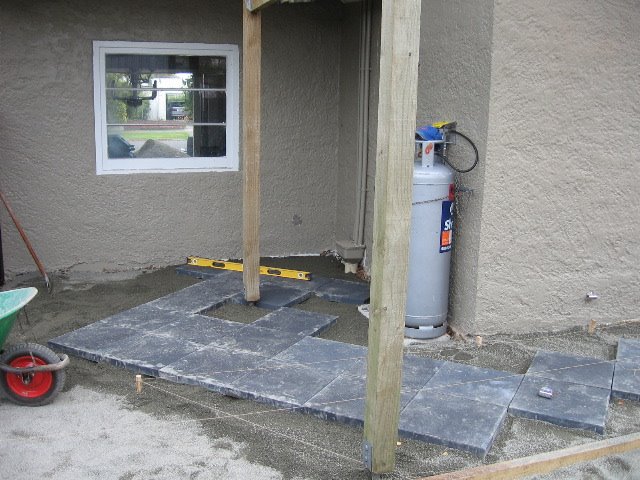
Here are some views as he started to get the pavers in place.


He did quite a job leveling the area. We opted to raise the patio above ground level, so now Karen is calling it a terrace.


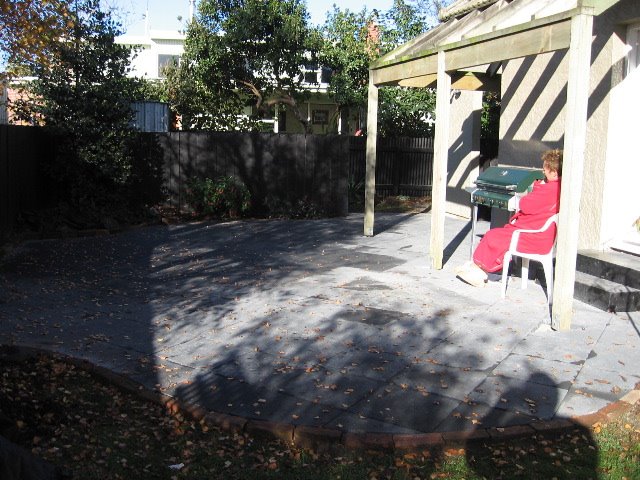
I got the brick trim on this side of the terrace in place on Saturday. Here, it is Sunday morning about 11:00 and Karen is enjoying the morning sun while she talks to her mom. Note the angle of the shadows. I'm standing to the north of her and all the shadows from the rafters are pointing south. By the time of the winter solstice, the sun will only be about 40 degrees above the horizon at noon.


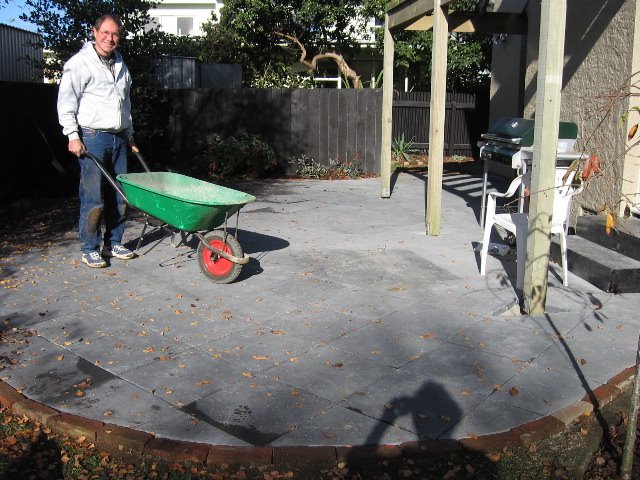
Later in the afternoon, the angle of the sun's rays is about the same. I'm hauling dirt out that I dug out to place the brick border around the terrace. Would you believe I moved four wheel-barrow loads of dirt?


On the last bit--the edge along the fence. Hard on knees and harder on hands. Unfortunately, one section went right under a beech tree with a huge root right where I wanted to put bricks. After trying to chop it out with a shovel and saw it out with a tree saw, Karen suggested a hammer and chisel. That eventually worked, but it was tedious.


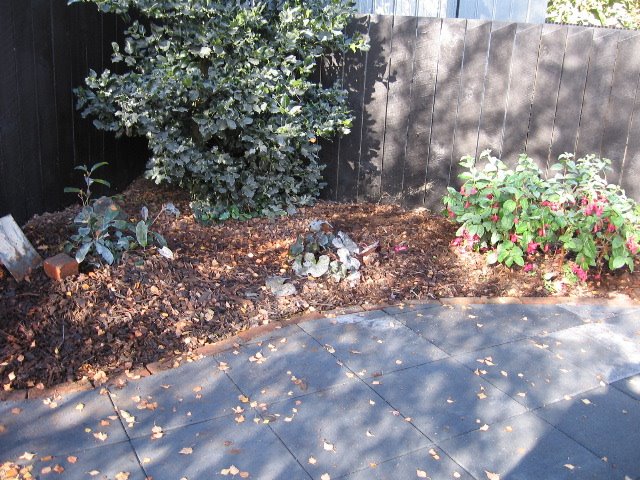
The finished product (almost). We've still got to put pave-lock in the spaces between the pavers to lock them into place.

I think it looks pretty good. It certainly looks bigger than I thought it would.

Saturday, May 06, 2006

The Finish of the Kitchen Remodeling Project


We received the 30 tiles we'd commissioned from Splashy and assembled them on a board to see how they were going to look. Luckily, they'd numered them on the back, so it wasn't exactly like a jigsaw puzzle.


Next, dear old Dad got to play with the tile adhesive and make the mosaic permanent. We opted to put them on a removable panel. They're just to beautiful to make them a permanent part of the house.


We put the board up with a poster adhesive--that didn't stick worth a darn! I added a little mastic adhesive to one side of the poster adhesive and figured the other side would pull away if we want to remove the mosaic. Here's the board up, but no grout yet.


Back away from the pukeko.


Further ...


Further ...


Grout in place, job done. Thanks Splashy, for a fantastic mosaic!

Tuesday, March 28, 2006

Before and After

I used to have a full head of hair. Well, a full head and a couple of other peoples' heads full too.

NO MORE!!!
Warning: The pictures that follow are not for the weak hearted. Or the weak kneed. Or cockneyed. Or Lou Reed. Or Daniel Day-Lewis. Or the Queen. Of Monaco.

The pictures contained in this blog show a very 'weak-stomached' attempt at chicken genocide.
the Deceased, Poxy, God Rest his ass on her obnoxious chicken face, was killed, plucked and (not pictured) bar-b-qued and served with cesar salad.

For the record, I never got a clean swipe with the axe and had to decapitate her using the 'drawn and quartered' method so popular in the eighties. 1380's. Also, she wasn't very tasty. She was a bit chewy and tasted a bit like spite and bittersweet revenge.

As you can see, we took the make-a-noose-with-old-string and tie-it-to-a-brick cause no-one-is-available to-hold-the-other-end method. It worked alright, except Poxy got loose of the noose and I missed on the first swipe. The second swipe amounting to little more than a paper cut and final beheading came with a firm tug of the old string.

Oh well, at least I had a laugh.

At the expense of something else. And their life.

So in the grand tally of Love-Albers versus nature, I have scored us a mighty point.

(Notice the stylish wool pull-over and gumboots)

Sunday, March 26, 2006

Week 5 of the Kitchen Remodeling project

Another week, but now we're mostly on our own. The lights are hung and the panels are all back on the counters. We've painted the back door and papered the kitchen with anaglypta.


Then on to the painting. The worst thing about painting is the preparation. We went through a lot of plastic drop cloths in the process. Note the lovely blue masking tape all along the ceiling trim.


We had to do it in two stages. First we did the area to the side of the cabinets as you can see above, then we put two coats on the area above the cabinets.


We had to shift all the plastic to cover just the lower cabinets while we painted the area between them and the upper cabinets.


And of course that area had to get two coats as well.


Finally, Karen got to do the decorator thing and start putting her touch on it.


Some of it was a matter of trial and error. We shifted baskets and paintings several times before it looked right.


But it all came together very nicely.


The only thing left is the mosaic we plan to put over the stove. That's the big brown space in this picture.


This is looking from the kitchen through the dining room to the doorway leading to the rest of the house.

Sunday, March 19, 2006

Week 4 of the Kitchen Remodeling Project

Monday we had our dining room and kitchen floors sanded and refinished. We had two more coats of varnish applied on Tuesday and the result is pretty spectacular as you can see in the next two photos.


Of course, the inconvenience of being totally banned from all things in the kitchen was pretty drastic. We had the fridge and the old microwave in the sun room, but forgot to get out such basic things as cereal before we were unable to get to them. The fumes were pretty potent as well.


Friday evening the builder came by to bring in our new fridge. Unfortunately, it is hinged on the wrong side and not reversible. The vendor said they would swap it out next Monday, but in the meantime we couldn't use it. Still, it looks pretty and is a bit bigger than our old one.


It seemed a shame to hide that beautiful Southern beech floor with a rug, but that's part of the decor. By Saturday the floor had cured enough to start putting things back.


Saturday we put a fresh coat of paint on the sideboard, washed all the dishes that were covered with sanding and construction dust and put everything back in place.


We also painted the new back door and door trim. They call door trim architrave here.


Sunday was very busy. We put up all the new anaglypta paper on the walls and it was a bear. (It's a textured wall covering--damned hard to deal with! Every piece was a "cut and fit.") We're not looking forward to painting it. I've been trying to convince Karen that white looks nice. We also finished moving everything out of the sun room, put two coats of polish on the floor in there and moved all the furniture that goes in the sun room back from the garage. Things are shaping up, but still not done yet (note the wires hanging from the ceiling, the wrong fridge and the white walls.)

Karen has already gone to bed. We are both pooped! But her new knee is amazing! It's not the knee that gave out--it was everything else!!

Sunday, March 12, 2006

Week 3 of the kitchen remodeling project

We've been waiting for plaster to dry as the jib stopper has completed the kitchen ceiling. Wouldn't you know it would be cold and rainy? We finally had to turn on the furnace and put a fan on it to speed it along. We also had to postpone the floor refinishing until next week. So, since there is not much progress to show, other than a beautiful ceiling, here are a few photos of some of the features in our kitchen. This first is showing the double silverware drawer.


The rug we have in the dining room has been rolled up in the hallway since the project started.


Plates, glasses, bowls all go in drawers.


Speaking of drawers. Here's a shot of our double dish drawer. This is a kiwi version of a dishwasher.


The dining room table and fridge have migrated to our multi-purpose sun room ready for the floor to be sanded and refinished. The sun room has been a lounge, Jamie's bedroom, my office, and now a makeshift dining room.


Ah, the toaster drawer. The electrician wasn't too sure about this, but it works. The power is shut off when the drawer is closed. That toaster is a gem. You should see it do bagels!


Looking back over our new counter at the dining room, all cleared and ready to be sanded.


How about this for a cook surface? This gas hob has 5 burners! Karen loves the big center one.


What we've been waiting on--the ceiling. It is certainly a much better job than I could have done. No signs of a seam anywhere.


One last look at the kitchen to date. We're gradually working out the best location for things. I put the microwave in myself. Then I couldn't figure out how to turn it on until I read the manual!